Monday, May 20, 2013

Earring Swap Blog Hop

Doesn't look like much does it!!!!!! 

WELL after the Bead Soup Blog Hop and the Znetshows "Diamonds in the Rough" Design Team Challenge, my muse FLED - like to another state! I even forgot my poor partner for a week or so because LIFE got in the way! Then one day I was sitting in my living room looking at the coffee table with piles of beads & wire MESS and remembered - Earring Swap!!! Oh dear, where was my phone (it was easier to get to than the computer), I needed to check e-mails. Sure enough, our wonderful host, Jessica Murray of Whimsical Monkey, had sent me two e-mails and my poor forgotten partner, Andrea Trank, had also contacted me. Time to get the Creative Thinking Skills in line and moving!!!

It's suppose to be Spring, but the weather has been terribly erratic. First cold (South Texas cold not Canada cold), then hot -in the 90's, then cool & windy, then hot like an oven - 98 with no humidity. Ugh!  :(   Naturally, we've had very little wet, but when it has rained, it's been awful with tornadoes and 50-70 mile hour winds. Of course, Texas weather is always changing from one extreme to another or hotter than you know what.  So I guess we should be used to it. But.....

Anyway, it's suppose to be Spring, so I thought of butterflies and hummingbirds. They're just beginning to come around! In one of her e-mails, Andrea had mentioned she liked copper. We have that in common, because I love wire work, especially copper!
Do you see the butterfly? I made chandelier butterfly earrings with crystals. In the sunlight, they sparkle with color like a butterfly. Andrea, I really hope you like them! :)

Exchange Time

Now that my project was complete and mailed off, I was waiting for Andrea to send me hers. Unfortunately, LIFE has gotten in the way for her as well. She has over-nighted them to me, so hopefully I will receive them tomorrow, Monday, May 20th. I am waiting with baited breath!!!!

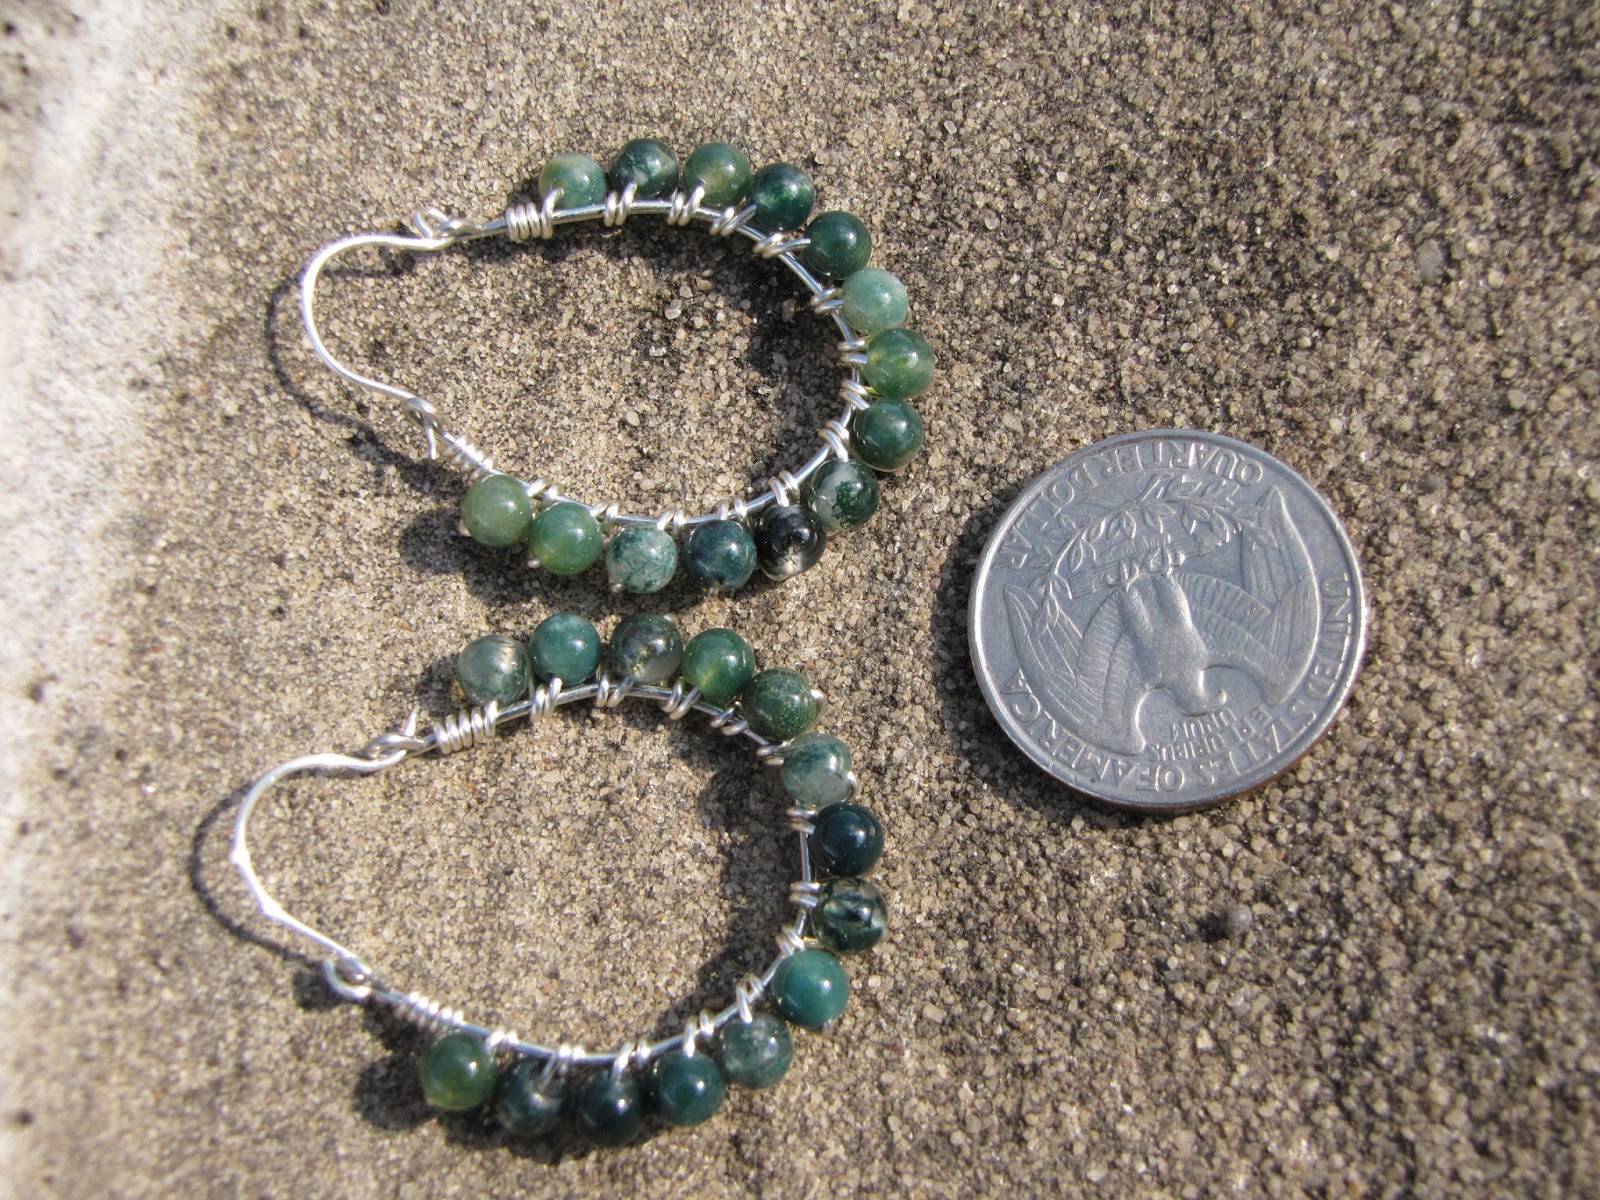
Monday 6 p.m. ---- The mail has finally come! Yeah, my earrings are here! Woohoo, Yippee, Yeehaw, Wahoo!!!!!!  AND I LOVE THEM!  Beautiful Peruvian Opals with Beige Glass Pearls & Silver Accents. So very lovely, I will wear them often. Thank you Andrea!


This was such a fun Blog Hop! Thank you Jessica. I know it was a lot of work for you. Please, know we appreciate your efforts greatly & hope you will do this again. :)

Now it's time to view all the other participants:

Our Host - Jessica Murray: http://whimsicalweavings.blogspot.com/2013/05/earring-swap-blog-hop.html
Inge von Roos: ingetraud.wordpress.com Nancy Smith: wirednan.blogspot.ca
Marianne Baxter: http://www.simplyseablimejewelry.blogspot.com/
Leah Tees: mybeadylittleeyes.blogspot.ca
MY PARTNER:  Andrea Trank: www.heavenlanecreations.com
Miranda Ackerley: http://blog.mirandack.com/
Cheri Mitchell-Reed: http://creativedesignsbycheri.blogspot.com/
Susan Kennedy: www.suebeads.blogspot.com
Michele Dotson: http://star-jewels.blogspot.com/
Deanna Cox: www.deannaaki.WordPress.com
Shelley Graham Turner: www.shelleygrahamturner.blogspot.com
Ingrid McCue: www.wrappedinsilver.com
Lennis Carrier: http://windbent.wordpress.com
Ginger Davis Allman: http://thebluebottletree.com/
Mary Anne Flesch: www.handcraftedserenity.blogspot.com
Nicole Valentine Rimmer: www.nvalentine.blogspot.com
Stephanie Weiss: uniquelymebwd.blogspot.com/
Silvia Sernicola: http://pipa-the-latest.blogspot.it/
ME:  Karla Morgan: www.TexasPepperJams.blogspot.com
Kay Thomerson: http://KayzKreationz.blogspot.com
Paula Hisel: http://simplybeadiful.weebly.com/simply-stated.html
Carol Dillman: http://dillmansdallies.blogspot.com/
Spun Sugar Beadworks: Spunsugarbeadworks.blogspot.com
Tara Plote: http://newbiebeader.blogspot.com/
Rachel Baron: http://rbarondesigns.blogspot.com/
Laurie Keefe: http://treeofliferootedinmysoul.blogspot.com/
Kashmira Patel: http://sadafulee.blogspot.com
Gina Hockett: http://www.freestyleelements.blogspot.com
Shellie Grindy: http://www.creativeeclectica.com/
Shai Williams: http://shaihasramblings.blogspot.com/
Dyanne Cantrell: http://deelitefuljewelrycreations.blogspot.com
Mimi Gardner: www.OtherCuriosities.blogspot.com
Jessica McMullen: http://pheonixgatedesigns.blogspot.com/
Jennifer LaVite: www.drygulchbeadsandjewelry.blogspot.com
Laura Medeiros: http://zoeowyn.blogspot.com/
Alenka Obid: www.pepita-handmade.blogspot.com
Elsie Fonseca: http://www.ladelizchica.blogspot.com/
Cheryl Dunham: www.renaissance-jewelry.blogspot.com
Sandra McGriff: http://skyescreativechaos.blogspot.ca
Tania Spivey: http://moobiegrace.blogspot.com/
Mowse Doyle:  http://mowsemadethis.blogspot.com
Mischelle Fanucchi: http://micheladasmusings.blogspot.com/

Facebook:
Beccy Peterson: Beccy's Baubles
Marde Lowe: FanciMar Designs


Sunday, May 19, 2013

Book Review!

Multistrand Jewelry Secrets for Success

Published by Kalmbach Books

Kalmbach sent me this book at the end of March to review. Unfortunately, my mother developed Macular Degeneration at the same time but we didn't know what it was. After weeks of doctor visits and tons of tests, we got the bad news. At the same time, I was working on the "Diamonds in the Rough" Znet Design Team project. This book couldn't have come at a better time AND it is fabulous! So many ideas & creations! My muse had taken a nose dive due to LIFE and this was just what the Doctor ordered! My muse got going! Woohoo! :)))

It is 87 pages packed full of Design Alternatives, Techniques, Supply Lists, and "Secrets for Success" for each of the 31 projects. The step-by-step instructions have wonderful photographs and pictures that can walk you through each project.  Also, the extra tips and design alternatives are wonderful for getting the creative thinking moving!

The book begins with information on How To Use This Book, Basic Techniques, Tools & Materials, and Multistrand Secrets for Success. This is all very helpful especially for the beginner or less experienced enthusiast. 

Each of us who design, create, and develop jewelry know how important it is to keep everything we do fresh and unique. This book is designed to help with "ideas" and "imaginative creating". I feel it does that very well! The possibilities for multistrand jewelry are endless. 

To wet your appetite: 
 
Mint Medley pg 16

Gemstone Twist pg 60
Blue Ribbon Style pg 40


Book Review!

Metal Jewelry in Bloom 

 by Melissa Cable
published by Kalmbach Books

When Kalmbach asked me to do a review on this book, I was thrilled! This is an outstanding book! There is so much packed into 111 pages. Many think that in order to work with metal, one must use a jeweler's saw or be able to solder. That is not so! Not only does Melissa Cable teach metal techniques without a jeweler's saw and no soldering but she also includes a wide variety of information about tools. She even includes patterns for cutting different flowers. At the end of the book and for the  more experienced metal worker/beading artist, she does include some soldering and cold connections.

Chapter 1 is all about Flower Fundamentals including tons of information, techniques, and even patterns. Five fabulously in-depth pages on Tools and Supplies with detailed pictures. I found this very helpful in determining whether I needed anything further to add to my collection. Determining petal shape, adding petal texture and dimension, embellishing, forming the flower center, riveting and adding color are all discussed in this chapter. 

Chapter 2 gets right into Forming Basic Flowers with 15 different flowers! I loved learning how to make the Lily on page 43 and the Dahlia on page 55. While I'm not good at it YET, it is so much fun and Melissa has really made it easy! Each page of information is easy to read and follow. Melissa gives the Template (pattern is included in the book) needed for that flower, Petal Shape, Cutting Notes, Edge, Surface, Center, and Assembly Notes. There is also pictures, photographs, and illustrations!

Wisteria page 61

Chapter 3 builds on the basics: Advanced Techniques for Flowers and Foliage. This chapter is broken into three sections: Crushed Flower Techniques, Tube Flower Techniques, and Leaf, Vine and Branch Techniques. On page 70, Melissa teaches how to make single & double Balled Headpins. This technique is needed to make the Wirewrapped Branch and Vine design on page 71. Safety notes are included along the way; which I found to be particularly helpful and good reminders.

Chapter 4 finishes the book with Metal Jewelry in Bloom beginning on page 76. These projects include the use of multi-media with leather, faux bone, lace, ribbon, chain and beads. There are also  a few projects that require some soldering for those who either wish to learn or already know how. I love the Delicate Lariat on pages 84 & 85.
Leather Panels page 98
While all the projects recommend a specific flower, it is completely possible to use your own creative abilities to mix it up with other flower arrangements. That is one of the best things about this book! Also, this book is designed for all areas of expertise; the beginner to the most experienced metal worker/beading artist. This book is a great asset and well worth having!


Chicken Tacos With Chipotle Salsa


This is a classic Mexican dish that we eat a lot of. In Texas, we call these Tacos but up north many call them Burritos. Either way they are delicious with chicken, pork, turkey, fish, or beef (ground or shredded).

Ingredients
  • 4 cups cooked chicken
  • 1 Tbsp ground cumin
  • 3 Tbsp olive oil
  • 1 red onion, thinly sliced
  • 2 bell peppers (1 yellow and 1 red preferably), thinly sliced and seeded
  • 2 cups Colby Jack (this is a blend of Monterrey Jack and Colby cheese), grated
  • 3/4 cup cilantro, finely chopped
  • 3/4 - 1 cup Texas Pepper Jam Chipotle Salsa
  • 6-8 tortillas
Note: For a BOLDER flavor, use Texas Pepper Jam Red Scorpion Salsa


 Preparation
  1. Heat oil in a large skillet (preferably a nonstick skillet) over medium heat. Add onions and peppers, saute until tender, about 10 minutes. 
  2. Add chicken and cumin. Stir well about 5 minutes.
  3. Add Salsa. Stir another 5 minutes.
  4. Remove from heat and cover to keep warm
  5. Heat tortillas on a dry skillet, flipping when brown spots appear. Repeat on other side. Tortilla will get soft & pliable.
  6. Remove from heat, fill with 2-4 Tbsp of meat mixture above.
  7. Sprinkle with cheese.
  8. Repeat with remaining tortillas.
Note: Filled tortillas can be kept in a warm oven, 200 degrees, until ready to eat; but no more than 10-15 minutes or tortillas will get crisp and crunchy.

Makes 4-8 servings.


Wednesday, May 8, 2013

"Diamonds in the Rough" Znet Challenge!


Recently a good friend, KayzKreationz, who also happens to be my daughter's mother-in-law (or out-law, which ever you prefer :0) asked me if I would be interested in stretching my jewelry creative abilities and "adopt" beads from www.znetshows.com. Since I had seen what she had created with the sea glass Bill had sent her on the last blog hop he did, I was more than thrilled to join in the fun and be part of the Znet Design Team!

For those of you who don't know - znetshows.com sells retail but mostly wholesale beads. They have a wide selection and great prices. There are pendants, beads, the usual and some unusual finds to be had.

This time around, Bill Zhang, the owner, had the participants choose 10 items to create with that have been overlooked by customers in their efforts to get the newest thing in product. Many of these items have been on the market for awhile and need "refreshing"! Well not really, because they're all beautiful! He wanted us to choose items we liked, we thought others might like, and some things that might stretch our own creative abilities.

My Creations


First, I made a pair of earrings with the two white shell rose flowers, silver plated wire and dark red seed beads. The roses are approx 30mm which definitely makes a great earring statement. The top is front drilled which made it easy to hang as earrings.

Shell white rose flower SCPDG153(PDG153-01)

Then, I took three items:
  1. Tree Agate donut pendant SCBDG118 (BDG118-34) about 35mm.
  2. Moss Agate round beads SCBDG56 (BDG56-40) about 4mm.
  3. Green Spot Jasper pebbles BDG1415(BDS1415-17) about 10-13mm.
These I combined with dark green Jade tubes about 15mm to make a necklace. The toggle I made out of the silver wire & used a pewter bead as the ring. The necklace is a hair over 20 inches long with the pendant hanging 2 inches.                                        


The bracelet is made of the moss agate rounds, green spot jasper pebbles and dark green jade tubes. It is 8 inches long.


Of course, no set is complete without earrings. So I used the moss agate rounds to make 1 inch hoop earrings.

                                                   
Next came the Howlite. I've never been into "white". But these were really pretty with dark grey/black threads running through them. Again I used a combination of three:
  1. White Howlite square puffed beads SCBDG44(BDG44-04B) about 12mm.
  2. White Howlite round beads SCBDG56(BDG56-04) about 4mm.
  3. White Howlite teardrop puffed beads BDS1447(BDS1447-04) faceted tip-drilled 16mm x 12mm.
These beads I combined with grey Swarovski crystal bicones and rondelles. The focal is made with silver plated wire and beads made to hang off center. The necklace is 23 inches long.


The bracelet is 8 inches with silver wired springs and stones with a handmade silver wired clasp.


The earrings are teardrop shaped wires that hang one inside the other with crystals and stones. They are approx. 3 inches long and 1 inch wide.


 The complete set!


Red Sardonyx was the next creation I made! (30x30mm in size BDS1213(BDS1213-42)).

First came the watch with Sardonyx diamond beads, bloodstone rondelles and pewter beads. I put a lobster clasp on each end of the watch "bracelet" so that it can be detached from the watch face and another "bracelet" attached for versatility. The watch bracelet is 8 inches long.

Second, came the necklace. The focal is made of 5 Sardonyx diamond beads approx 5 inches wide by 3 inches long hanging on silver plated wire from two ropes of chain. The necklace is 26 inches long.


I love pendants and wire wrapping! So when I saw the Red Agate oval puffed bead (it's color enhanced but it actually looks like amber); about 40mm x 30mm BDS1216(BDS1216-02); it just called my name! I wire wrapped it with bronze copper wire and used it as a pendant on a chain, bead, and flat Kumihimo necklace.

The chain is bronzed copper. The flat Kumihimo is made from white, black, brown, and grey ribbon. I also added a rope of beads made of antique brown crystals and beads that were my grandmothers. They are definitely vintage; approx 50+ years. This necklace is 21 1/2 inches long with the pendant hanging approximately another 3 inches.

Of course, I had to make the "accessories" to go with this necklace, so here are the matching earrings and bracelet made from flat Kumihimo and vintage crystals & beads with a little bronze wire thrown in for good measure.

The bracelet is 7 1/2 inches long with two strands - one flat Kumihimo and the second, a chain with a coiled "spring" of wire and beads that float.
 

The earrings are made from bronzed copper chain and matching beads. They are about 2 inches long.


Lastly! I took the green Zebra Jasper teardrop puffed pendant SCPDG202(PDG202-69), 40mm x 30mm, wire wrapped it with bronze copper wire to hang on a chain or wire necklace. The bail is large enough to go over a beaded necklace no larger than 15mm. It is approx 3 inches long.

Some years ago, I made a copper wire necklace that slips around the neck without clasping; like a choker cuff. It is so comfortable and light that you almost forget it is there. I decided to make another one out of the bronze copper wire. It is hammered flat to lay against the skin and is about 15 inches in length so that it fits like a choker but without "choking" you.

There you have it!  Whew! :)))  Quite an assortment of designs and creations with the "adopted" ZNet beads - 12 items, 15 if you count the bronze copper wire necklace and the vintage bead earrings and kumihimo bracelet . I know most of you don't care about the measurement information, but I'm trying to get myself in the habit of keeping better notes. So you get to be the "guinea pigs" this time! :0

I had so much fun, I would love to do this again!

Znetshows.blogspot.com will have a list of the other participants on the Design Team and post pictures in the Jewelry Gallery. Viewers can also vote for their favorites on Znetshows Facebook page.


Thursday, May 2, 2013

Nina Designs & My Creations!


Back in January, I contacted DeAnna at Nina Designs about joining the Nina Designs Blog Partners. They have also launched a new Blog Partnership Program on Facebook that I find very exciting. So when DeAnna e-mailed me that I would be accepted to join, I was ecstatic! At the end of March, Nina Designs sent me findings, charms, and leather cording - gold tone and green. What's not to like about those colors!

The "package" arrived while Art & I were in Florida visiting our daughter & son-in-law. When we got home & I opened it, I was so excited to get started I forgot to take pictures of "the items". :(  What a ding dong!  Everyone knows you take pictures BEFORE you start work on creating! Two days later, my mom had a black spot in her left eye & couldn't see. So the next few weeks were taken up with doctor visits to specialists to find out what was wrong. Long story - short - wet macular degeneration! Oh boy! Anyway, I did take pictures but it was after work began. Sorry DeAnna!

These pictures are from the links DeAnna sent me. Nina Designs has a great website and a very nice selection of product.
Sage deer hide leather cord
                                      
Bighorn sheep skull pendant

Small circle link
heart charm
Branch toggle

Feather charm
Ear wires


When I remembered to take a picture, it was about midnight. Really not the best time to take pictures!
With non-tarnish gold wire, I wired the small circle links together loose enough so they move & float on the wrist. Then I braided the leather & wired the ends of it.
Next, I wound the leather braid through the two center circle links only & attached it at each end of the bracelet but not to the toggle.

Then it was on to attaching the pendant, the charms & a few gemstones. I used some jade prism  & cylindrical beads that I purchased at a bead show in Austin, TX a few years ago. The color is a perfect match to the leather & looks soooo good together.

Finally, the earrings - a piece of braid, a circle link, a charm for each (I used a feather on one & a heart on the other as I do like things asymmetrical on occasion), and a bead.


         My Creations!  

Thank you Nina Designs for allowing me the privilege of working with you and I hope we can do it again.  Nina Designs can also be found on Facebook at https://www.facebook.com/ninadesigns

The materials above were provided as part of the Nina Designs blogging program. The author of this blog has not received any payment from above-mentioned company. The post above represents only personal opinion of the blog author.